Full Workforce Connect Guide

Written by Cameron Arney
Updated at February 22nd, 2024
Table of Contents
Safe365 is a platform to help you access, improve and monitor your organisations health, safety, performance, and engagement. Safer workforce. Better business.
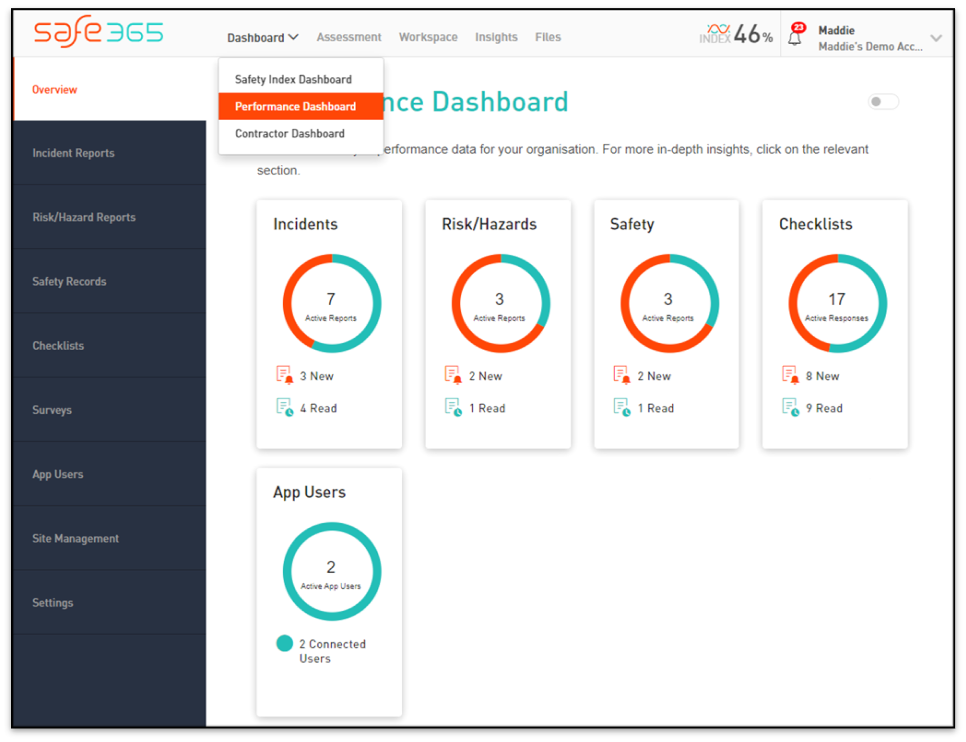
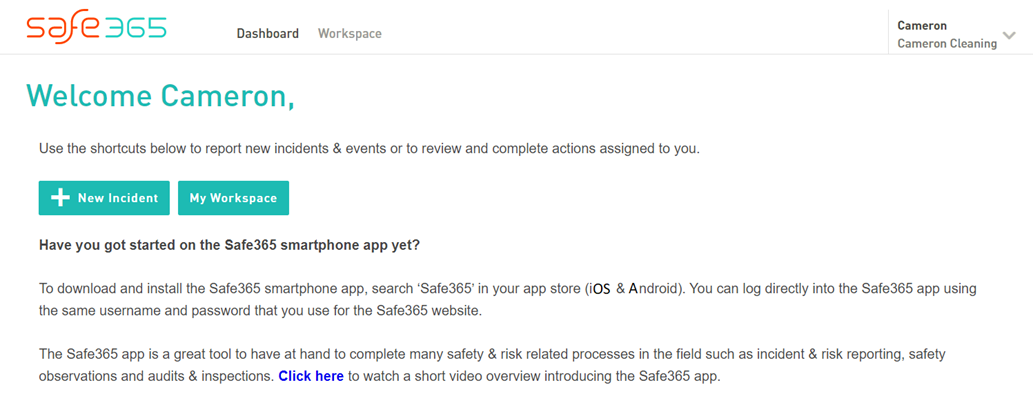
Workforce Connect (Performance Dashboard)
The performance console is the connection with your workforce.
Staff using the Safe365 app can report incidents, and risks and can complete checklists, and all of this data is reported to the performance console.
From here you can review and complete any required actions for any of the submissions.
Checklists
Checklists can be built for any area of the business - not just health and safety.
We have examples of forklift operators completing a daily prestart checklist, or office managers completing a checklist for the monthly audit of the first aid equipment.
Each specific checklist has all the submissions to it similar to Incidents and Risks.
How to Create a Checklist
Within Safe365 you can create Checklists for anything you require. These can be daily vehicle or machinery checklists, or monthly office or safety checks, through to inductions.
Checklists can be completed from the Safe365 app, and can be accessed from within the app, or via QR codes.
Checklist Types Explained
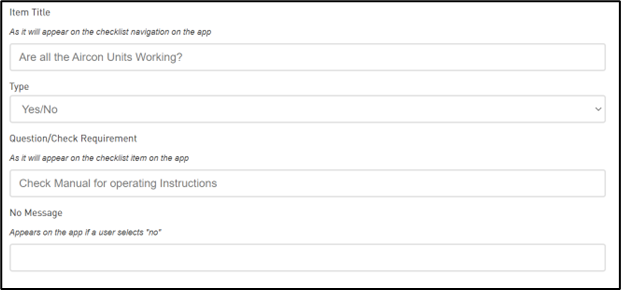
- Yes/No
This is a simple Yes/No option.
 |
 |
- Yes/No with Escalation on No response
This uses the escalation functionality when a No answer is selected. This is activated by adding a No Meaage when creating the checklist. Where a user selects No, it will prompt an email to be sent to the Escalation Notification group, and display the No Message
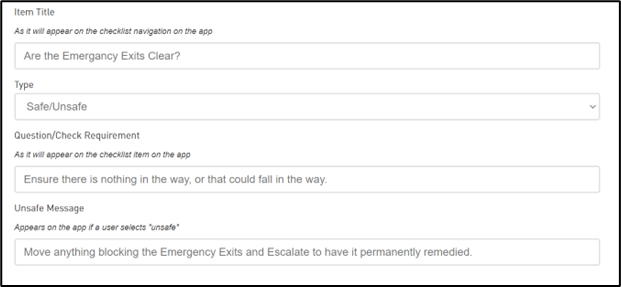
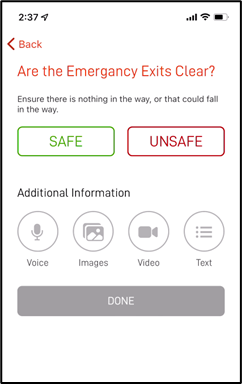
- Safe/Unsafe
Gives the user the options of Safe and Unsafe.
When a user selects Unsafe, it will prompt an email to be sent to the Escalation Notification group and also display the Unsafe message.
 |
 |
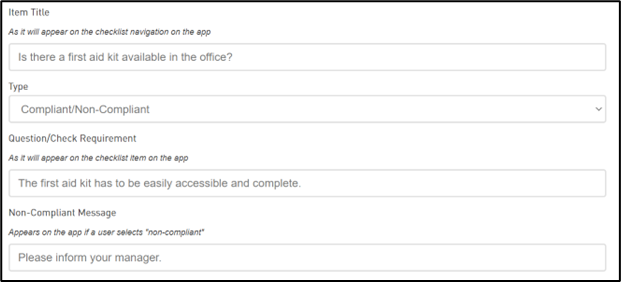
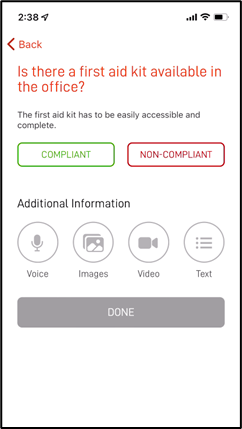
- Compliant/Non-Compliant
Gives the user the options of Compliant and Non-Compliant. Where a user selects Non-Compliant, it will prompt an email to be sent to the Escalation Notification group, and also display the Non-Compliant message
 |
 |
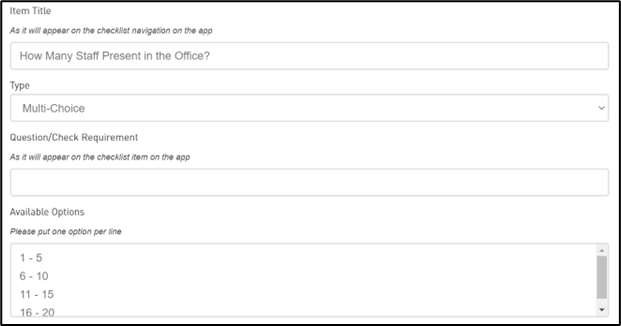
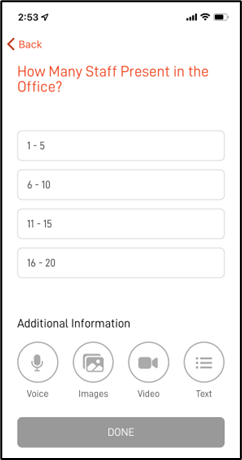
- Multi-Choice
Gives the user a list of options to select from, where only one option can be picked.
There must be options available, or the checklist will not be able to be completed.
 |
 |
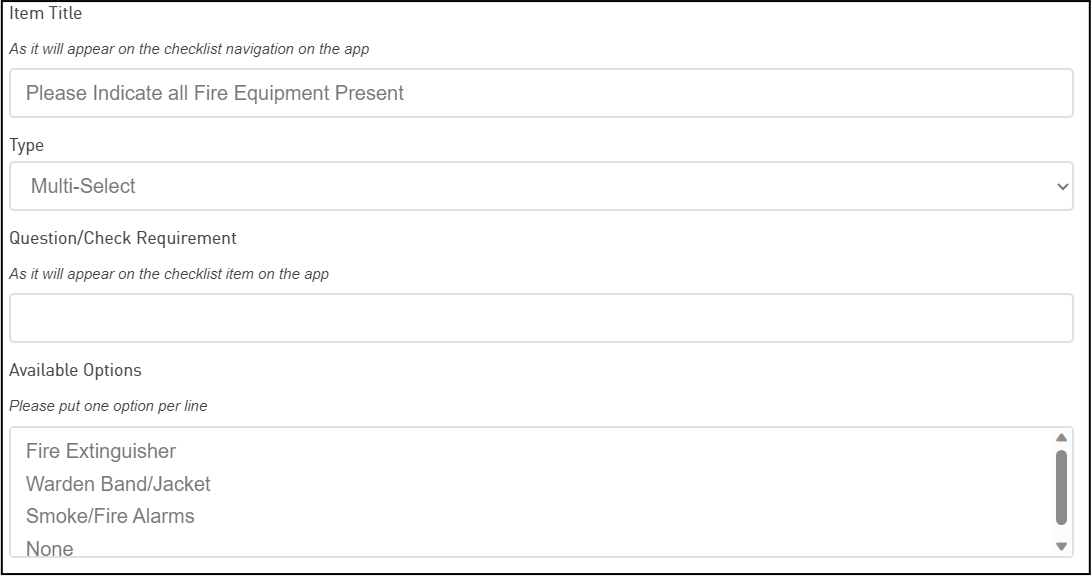
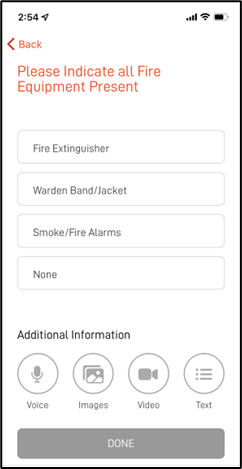
- Multi-Select
Gives the user a list of options to select from, where multiple options can be selected
There must be options available, or the checklist will not be able to be completed.
 |
 |
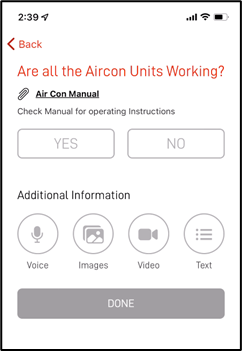
- Text/Audio/Image/Video
Directs the user to have to answer the question with the respective option.
All checklist answers have the ‘Additional Information’ sections where the user can enter in extra or supplementary information as required.
All other guides for these checklist features can be found in our Workforce Connect section of our Help Centre.
Incidents, Risks and Safety
Incident reports, Risk/Hazard reports and Safety Records are reported by staff and appear under their respective sections. The function and flow of these three elements is the same, so the details outlined show for Incidents, but are the same for Risks and Safety observation.
Details of submissions can be viewed by clicking on the specific entry.
This shows the information that has been entered by the worker via the Safe365 Smartphone App.
Guides for using the Safe365 app can be found here Safe365 App
All other guides for these features can be found in our Workforce Connect section of our Help Centre.
Working with Submitted Reports
Adding notes to an Incident
Notes can be added to an Incident report, to keep everyone updated with any work that is being carried out.
Create an Action inside an Incident Report
Safe365's Action feature is available throughout the entire platform. When investigating an Incident Report you may find some follow up Actions need to be taken, this feature will allow you to notify other Users in your Safe365 account to complete tasks.
Files
In the files section you can upload documentation relating to your health and safety practices.
Examples of what could go on here Is evidence of the justifications for answers from the maturity assessment, or more generally files relating to your health and safety processes.
How to use Safe365 Files
The Safe365 Files section is completely blank when you start your subscription. This feature can be used in any way to help you store relevant information in one place.
Folders can be created in here for different areas of your business, i.e. assessment modules, SSSP, JSA, Policies & Procedures.
All Standard Users and Administrators can access these files on the system.
If you want to edit and make changes you have to do this off the Safe365 system.
How to Create a Folder within Files
Workspace
All users have a workspace that is specific to them, that shows their assigned actions.
As an admin, within your workspace, you can view all the actions within the organisation.
Within Workspace you can also create new actions.
Learn more about Safe365 Workspace
Workspace is a great tool to manage all your actions for your team.
Here you can set up notifying other connected users to specific tasks that need to be completed.
Once Actions have been created the system will automatically notify users that are assigned to the action.
Our full guide shows everything you need to know about the Workspace.
Full Actions User Guide
Actions Overview
Within Safe365 you can create Actions and assign these out to any user within your organisation. Actions can be created from many places within Safe365 which we will highlight in this user guide. Actions can be created for any work item that needs to be completed, either as a one off or repeating.
Actions Dashboard
As an admin, you will be able to see all Actions assigned out to all users. You can then filter this by deadline, priority, status and user as shown below.
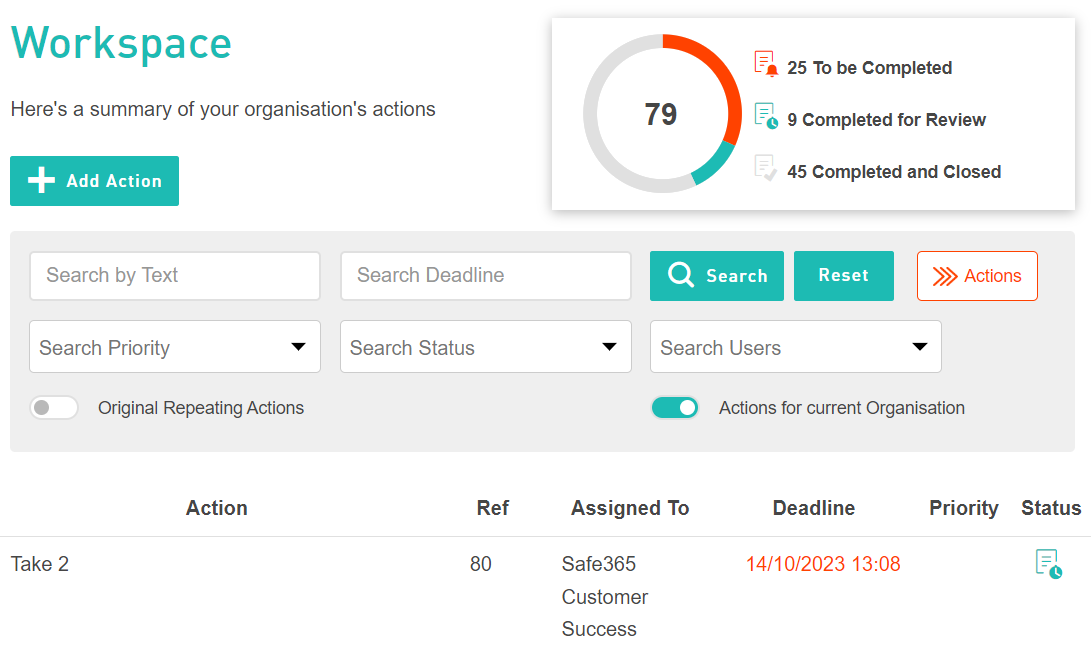
Original Repeating Actions
When this is toggled on, it will then display those actions that are set to repeat, where these can be edited or changed as required. This doesn’t show the instances of the repeated actions.
Actions for Current Organisation
When this is toggled on, you will only be shown actions for the current organisation you are in. Vice versa when this is off you will see all actions owned or assigned to you from any Safe365 organisation.
Workers View within Safe365 Web Portal
All workers can now access Safe365 from the web. Interacting with Actions can be done in the web portal, so we have created a dashboard and workspace for the worker role.
Workers will still have full access to the Safe365 smartphone app, but now they can also create and complete actions, and lodge Incident reports from the web.
How to Create Actions in Safe365 Workspace
Actions can be created throughout the Safe365 System. The centralised place for Actions is inside Safe365 Workspace. Here, you can also create Actions and assign them out to users in the system.
Creating an Action in Workspace
How to create an Action
Action Tags Explained
Action Tags Explained
When creating an Action across the platform you will see multiple action tags available, this guide explains the different tags and how you can use them.
Setting up a Repeating Action
Across the meta-tags you can set up a Repeating Action. This can be extremely beneficial for reminders in the upcoming months and years.
Examples of repeating actions can be, vehicle checks, office checks, plant & equipment checks etc.
Setting up a Repeating Action
Actions within the Safety Index
In the Maturity Index, Actions can be used as reminders for tasks in the upcoming months.
When in the maturity assessment you will see the Actions button available to create an Action right inside the question.
How to add an Action in the Safe365 Maturity Assessment
Adding an Action in the Safe365 Maturity Assessment
You can set up Actions within your Safe365 Maturity Assessment, these could be reminders or tasks. These Actions can also be assigned to other Users in the Safe365 account.
Some examples of these Actions could be:
- Reviewing Documentation
- Making changes to processes
- Reminding of tasks
These Actions will sit directly in the question you've assigned it to but it will also be available in the Workspace Tab.
Actions within a Submitted Report
This feature is also available in the Performance Console, meaning you can create Actions directly into the reports being submitted by users.
Actions can be used for follow up actions from these reports.
How to create an Action inside an Incident Report
Create an Action inside an Incident Report
Safe365's Action feature is available throughout the entire platform. When investigating an Incident Report you may find some follow up Actions need to be taken, this feature will allow you to notify other Users in your Safe365 account to complete tasks.
Actions are available throughout the entire platform.
Workspace is the where all assigned actions are listed.
You can add Actions within the Performance Console connected to reports.
Create an Action inside an Incident Report
Safe365's Action feature is available throughout the entire platform. When investigating an Incident Report you may find some follow up Actions need to be taken, this feature will allow you to notify other Users in your Safe365 account to complete tasks.
Actions can also be useful as reminders for different areas of your Safe365 Maturity Assessment. If you need a reminder to review documentation on a specific cycle, there are other meta data tags that can be used within Actions.
Action Tags Explained
When creating an Action across the platform you will see multiple action tags available, this guide explains the different tags and how you can use them.
These will all be listed in Workspace for viewing.
Admin Functions
Most of the admin functions can be accessed via the Admin Menu. The admin menu is the top right corner under your name.
Inviting New Users
As an admin user, you have the ability to invite users into your Safe365 account by adding them in with their email address.
There are different roles of users within Safe365:
- Administrator - has full access to Safe365 web portal and the Safe365 app.
- Standard User - has access to the Safe365 web portal and the Safe365 app, but does not have access to billing or users.
- Viewer - has access to the Safe365 Maturity Index only in the web portal, and access to the Safe365 app.
- Worker - has access to the Safe365 smartphone app.
How to Invite a User to your Safe365 Account
If you are an ‘Administrator’ in your Safe365 account you have the ability to add a new user to the account, all you need is their email address.
When adding a new User, you need to select their ‘Role’, these are explained below.
- Administrator
This user has access to all areas of Safe365 for the organisation, including maintaining subscription and billing information, and controlling the access of other users within the organisation.
- Standard User
This user is able to perform assessments and generate reports. These users may also update information about the organisation, though they do not have access to the subscription information or the ability to add or remove users.
- Viewer
This user only has read-only access to the assessment details.
- Worker
This user only has access to the mobile application for the organisation.
Update Payment Information or Subscription
From the admin menu, you can update your subscription and billing in this tab. Here you can also update payment information, download invoices and change your plan.
How to Update Your Credit Card
This guide shows you how to update your Credit Card details for your subscription.
Safe365 Smartphone App
The Safe365 app can be downloaded from the Android or Apple app store and users can use this app to report incidents, hazards, complete checklists and much more.
For an overview of the functionality, check out our Full App User Guide.
Full App User Guide
Full App User Guide
This guide takes you through getting set up in the Safe365 app, and then how to complete each of the available reports through the Safe365 App.
How to set up your Safe365 App
All users connected to your organisation have the ability to complete incidents reports, risk/hazard reports, safety observations and checklists.
Each user is connected via their email address, once they are invited into the organisation as a user they can set up their profile information where this information is available to ‘Standard Users’ and ‘Administrators’ on the web-console.
Each user must be connected to the organisation to ensure that all reporting goes to the web-console Performance Dashboard. If a user is not connected to the organisation, the reporting will not flow through to the web-console.
Register to the Safe365 App
Register to the Safe365 App
This takes you through Registering to the Safe365 app.
Connect to an Organisation
Each Safe365 user must connect to an organisation on the Safe365 app to ensure all their reporting goes through to the web-console for managers to see.
There is an easy way to check you are connected to an organisation by looking at your phone screen on the app and it will say, connected with: organisation name.
Connect to an Organisation
This will show you what to check to ensure you are connected to your organisation.
If you do not find your organisation to connect to, then you will need to reach out to one of the Admins to have them invite you.
Update your Profile
The app user is responsible for setting up their profile and making any changes in the future.
Here they can also upload training records or certifications that you need to see on the web-console. Examples of these can be drivers licensees, first aid certificates etc.
Update your Profile
How to use the Safe365 App
The Safe365 App provides the work flow for Incident Reporting, Hazard/Risks Reporting and Safety Observations.
Checklist questions are all designed on the web-console then the Safe365 App creates the rest of the workflow for users to complete.
Complete an Incident Report
Submit an Incident Report
An Incident report should be submitted after anything happens to incur injury or harm within the Workplace.
Complete a Risk/Hazard Report
Submit a Hazard Report
Health and Safety is a collective responsibility. Report anything you see that could cause harm or injury within the Workplace.
Complete a Checklist
Complete a Checklist on the Safe365 Mobile App
All Safe365 checklists are completed on the mobile app, below is a quick guide of how to do this on the app.
Report an Incident
Submit an Incident Report
An Incident report should be submitted after anything happens to incur injury or harm within the Workplace.
Report a Hazard
Submit a Hazard Report
Health and Safety is a collective responsibility. Report anything you see that could cause harm or injury within the Workplace.
Report a Safety Observation
Report a Safety Observation
Within the Safe365 mobile app you can report safety observations. Here you can select from users who completed this with you.
Like the other functionalities on the Safe365 app, this will automatically connect to your web-console.
Complete a Checklist
Complete a Checklist on the Safe365 Mobile App
All Safe365 checklists are completed on the mobile app, below is a quick guide of how to do this on the app.
Getting Help with Safe365
Our Help Centre has numerous resources for each functionality across the Safe365 platform. Here you can also search anything in the platform to access resources fast and easily.
Our Get Help Here tool is available within every page of the Safe365 web-console. This is available on the left-hand side of your screen as a drop down menu. Here you can search walk-throughs and guides across the platform.
Customer Support
There is always the Customer Success team who is on board to help with those more specific or technical questions.
They can be reached at support@safe365global.com. The team are available for your queries and will direct users to our Help Centre for the more common questions.