How to Create a Checklist

Written by Cameron Arney
Updated at September 1st, 2023
Table of Contents
Within Safe365 you can create Checklists for anything you require. These can be daily vehicle or machinery checklists, or monthly office or safety checks, through to inductions.
Checklists can be completed from the Safe365 app, and can be accessed from within the app, or via QR codes.
Checklist Types Explained
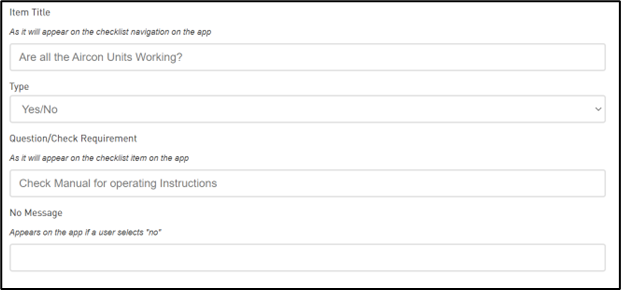
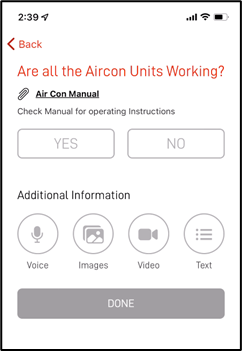
- Yes/No
This is a simple Yes/No option.
 |
 |
- Yes/No with Escalation on No response
This uses the escalation functionality when a No answer is selected. This is activated by adding a No Meaage when creating the checklist. Where a user selects No, it will prompt an email to be sent to the Escalation Notification group, and display the No Message
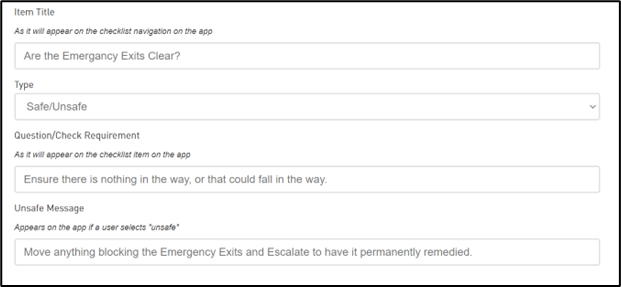
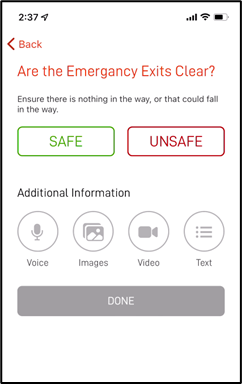
- Safe/Unsafe
Gives the user the options of Safe and Unsafe.
When a user selects Unsafe, it will prompt an email to be sent to the Escalation Notification group and also display the Unsafe message.
 |
 |
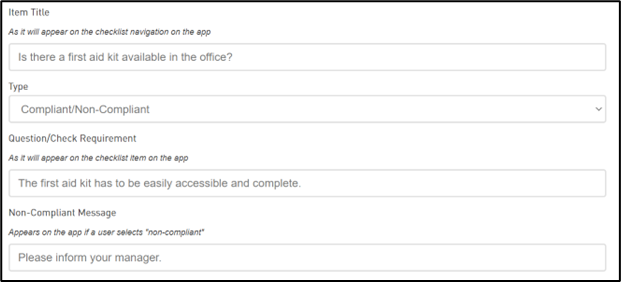
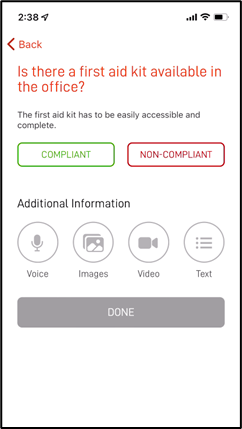
- Compliant/Non-Compliant
Gives the user the options of Compliant and Non-Compliant. Where a user selects Non-Compliant, it will prompt an email to be sent to the Escalation Notification group, and also display the Non-Compliant message
 |
 |
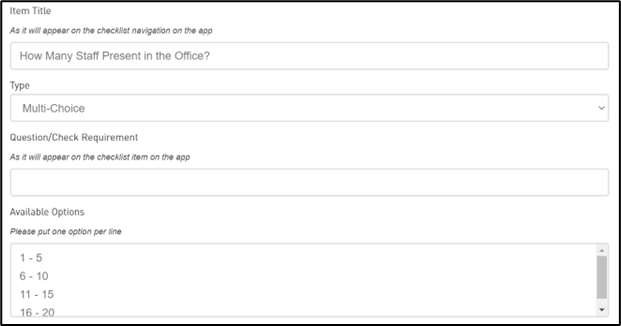
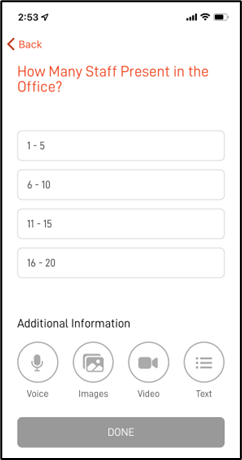
- Multi-Choice
Gives the user a list of options to select from, where only one option can be picked.
There must be options available, or the checklist will not be able to be completed.
 |
 |
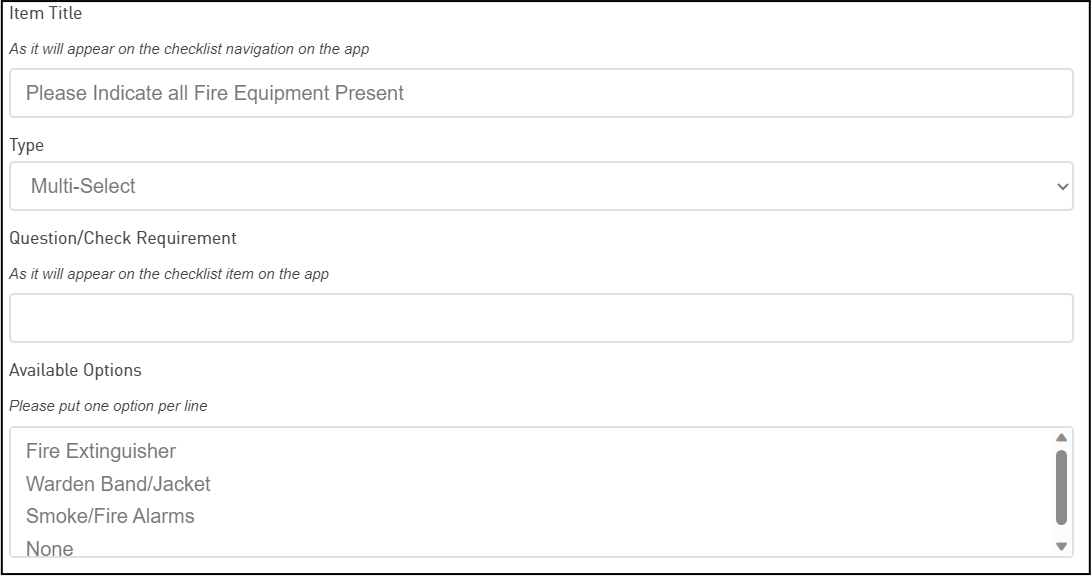
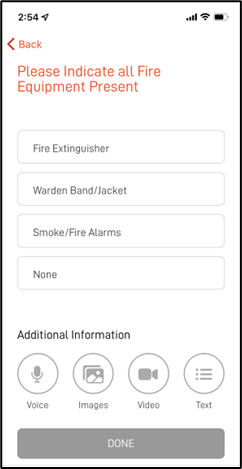
- Multi-Select
Gives the user a list of options to select from, where multiple options can be selected
There must be options available, or the checklist will not be able to be completed.
 |
 |
- Text/Audio/Image/Video
Directs the user to have to answer the question with the respective option.
All checklist answers have the ‘Additional Information’ sections where the user can enter in extra or supplementary information as required.